If you’re looking for a beginner guide photo calorie counting, this page walks you step by step through how photo-based logging works, how accurate it really is, and the simplest way to turn it into a habit you’ll keep. By the end, you’ll know which apps to try, the fastest way to start, and the small adjustments that create big results without obsessing over every bite.
**Download free Android app →, sizes the portions, and returns a breakdown for energy, protein, carbs, and fat. Because these models are trained on millions of food images, they can recognize common meals across breakfast bowls, lunch salads, and dinner plates.
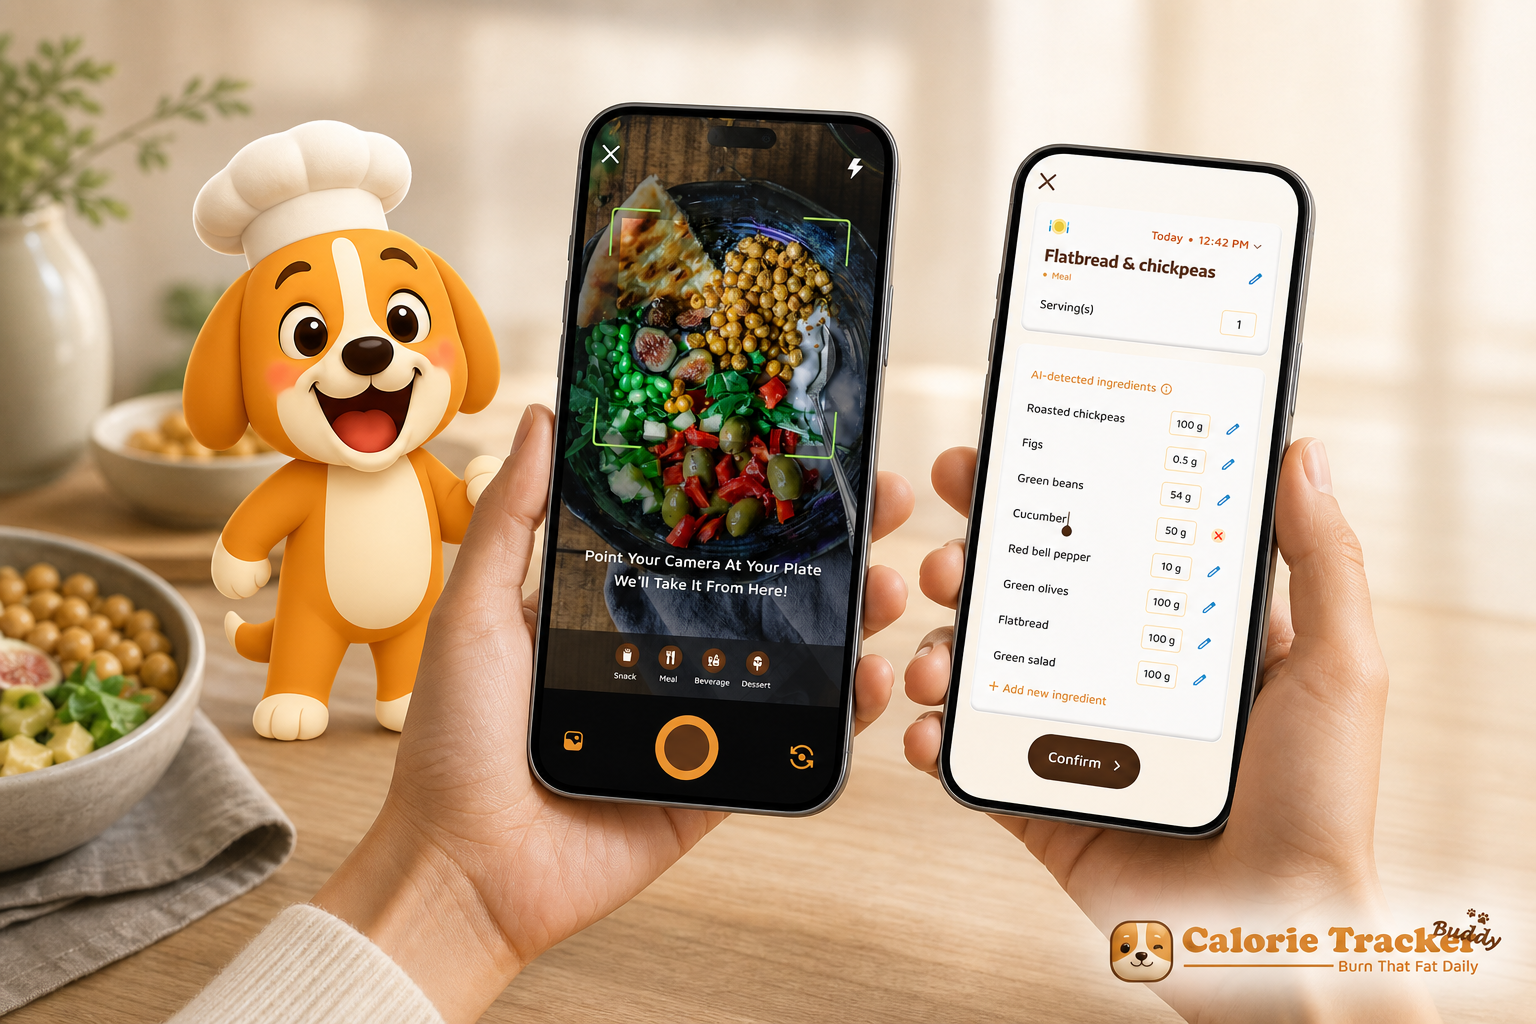
Here’s the simple flow a friend would walk you through: snap → identify → size → breakdown. In practice, you’ll see your meal logged in seconds with real-time feedback on how it fits your day. If you care about carbs at lunch or protein after workouts, you’ll see those numbers without hunting through a database.
Accuracy in Plain English
Expect estimates within about 10–20% of manual logging for clear, common meals. For mixed dishes, soups, or restaurant plates drowned in sauce, the spread can widen. That’s normal. The app can’t see salt, added sugar, or oil that never hits the plate.
Why does that still work for beginners? Because the worst barrier is the grind of typing and weighing. With photos, you can log three meals in 30 seconds instead of skipping the log. Consistency beats precision in the first month.
- Workflows are trained on large food-photo datasets.
- Real-time feedback helps you adjust at the next bite, not next week.
- Use photos as an estimate tool, not a lab test.
For a relatable picture: think back to that pasta plate. Without photos, you might give up. With a snap, you’ll see something like 2 cups cooked pasta (~400 kcal) + cream sauce (varies) + chicken (~150–250 kcal). It’s not perfect, but it’s enough to make a better call at dinner.
For more on what these tools can do, skim this primer on a photo calorie counter and a deeper look at common photo calorie counter features.
Practical tips to improve accuracy from day one:
- Frame the whole plate: Include all sides, toppings, and sauces in one clear shot so the model “sees” the full meal.
- Add a size reference: A standard fork, spoon, or your hand near the plate gives context for portion sizing.
- Use good lighting and a top-down angle: Overhead shots with even light reduce shadows that can confuse food boundaries.
- Photograph before you mix: If you can, snap the bowl before stirring in dressing or toppings so ingredients are easier to identify.
- Confirm cooking method: If your app allows text notes, add “grilled,” “fried,” or “with oil” to nudge estimates toward the right macro profile.
How to Start Photo Calorie Counting in 5 Simple Steps
Starting small works. The goal is to build a habit you keep, not a sprint you quit.
Step 1: Set a simple calorie goal
Pick a rough daily target using a basic TDEE method. You can check the math behind it on the Harris–Benedict equation (Wikipedia).
Don’t chase perfection. Choose a reasonable number and move on. You’ll refine after a week of real data.
- Example: If your rough TDEE is 2,200 kcal, try 1,900–2,000 for mild loss.
- Protein idea to start: 0.6–0.8 g per pound of body weight per day.
- Hydration anchor the app may remind you of: about 2.5 liters/day.
Quick calibration tips:
- Weigh once: Grab your current body weight and an honest activity level; skip complex formulas at first.
- Choose a range, not a point: A 100–200 kcal range gives flexibility for social meals or tough days.
- Reassess weekly: If your average trend isn’t moving after 2–3 weeks, nudge calories or activity by ~100–150 kcal/day.
Step 2: Choose a photo-first app
Pick an app that feels simple on a busy day.
- Easy camera flow with photo-based tracking and real-time feedback
- A large food database and macro tracking (carbs, protein, fat)
- The ability to edit the AI’s picks and portion sizes
- A free tier so you can test without stress
Tools that offer goal predictions (“If you eat this, your day lands here”) make choices easier at lunch, not just in weekly summaries.
Extra checks before you commit:
- Transparent privacy: Look for clear statements on how meal photos are stored, anonymized, or deleted.
- Data portability: Make sure you can export your logs (CSV or PDF) if you switch apps later.
- Accessibility: Voice input, large fonts, and color-blind-friendly charts make daily use easier.
Step 3: Start with one meal a day
Track only lunch for the first week. That’s it. This drops overwhelm and builds a streak you can keep. If you forget dinner, no guilt. A single daily photo still teaches you a lot.
Momentum boosters:
- Set a phone reminder 10 minutes before your usual lunch time.
- Pre-open the camera from the app’s widget so snapping is one tap.
- Keep your phone on the table—out of sight is out of snap.
Step 4: Review and adjust the AI’s estimates
Spend 10 seconds checking the portions. Correct clear misses. For example, the app might label white rice as cauliflower rice or call 1 cup pasta when you had 2 cups. Fix that and save. This trains your eye and, in some apps, improves future picks.
- Cooking oil matters: that “invisible” tablespoon is about 120 calories.
- Sauces count: a 2-tablespoon ladle of creamy sauce can add 80–120 calories.
- Drinks add up: sweet tea or a latte can rival a snack.
Portion calibration mini-guide:
- Cups vs. weights: If your app supports both, default to cups for speed and switch to grams for your most frequent foods.
- Use hand guides: Palm of protein ≈ 3–4 oz cooked; cupped hand of carbs ≈ 1/2–1 cup; thumb of fats ≈ 1 tbsp.
- Sanity-check macros: If a “grilled chicken salad” shows more fat than protein, you probably need to adjust dressing or oil.
Step 5: Expand to all meals after 1–2 weeks
Once lunch logging feels automatic, add breakfast, then dinner. If a day goes sideways, log the photo anyway. An approximate entry is 100x better than a blank space. Over time, you’ll notice patterns that fit your calorie intake and burn tracking.
“Before using the app, I didn’t know where to start with calorie tracking. But now, it’s second nature! The meal snap feature is a big improvement.” — Aanya Rastogi
As you build the habit, goal predictions that show how each meal impacts progress help you steer the day in real time. Pair that with basic activity tracking, and you’ll see how a 30-minute walk nudges the numbers in your favor. For time-savers, keep this list of calorie counting hacks handy.
Get started in under 5 minutes →
Also Read!
5 Beginner Mistakes to Avoid
1) Expecting perfect accuracy
Photo estimates are guides, not lab results. Use them to learn “about how much” and make better choices at the next meal. Perfection thinking kills momentum.
2) Not correcting the AI
Blindly accepting every guess is the fastest way to drift. Spend 10 seconds to fix obvious misses: the wrong grain, a mixed topping, or a portion half the size. That tiny tweak can swing 150–300 calories.
3) Forgetting drinks, sauces, and oils
They’re easy to skip because they don’t always show up in the photo. Add them. A tablespoon of olive oil is about 120 calories. A medium latte can be 150–250. A 2-tablespoon ranch pour is often 120–140.
4) Trying to track every item on day one
Going from zero to “track all the things” burns you out by day three. Start with one meal. Add more when it feels natural. Consistency beats precision for beginners.
5) Using tracking as punishment
Treat this like data gathering, not judgment. Curiosity helps you learn. Guilt makes you quit. Some apps let you set dietary preferences and allergies so your logging feels supportive, not strict.
“I’ve been using Calorie Tracker Buddy for five weeks, and I’ve already lost 4kg! I didn’t have to cut out my favorite foods. It’s all about balance!” — Alex Sim
If a day goes off the rails, log the photos anyway. The real-time feedback will still teach you something you can use tomorrow.
Photo Calorie Counting Tools Worth Trying in 2026
Choosing a tool is personal. Pick the one you’ll actually open when you’re hungry and busy.
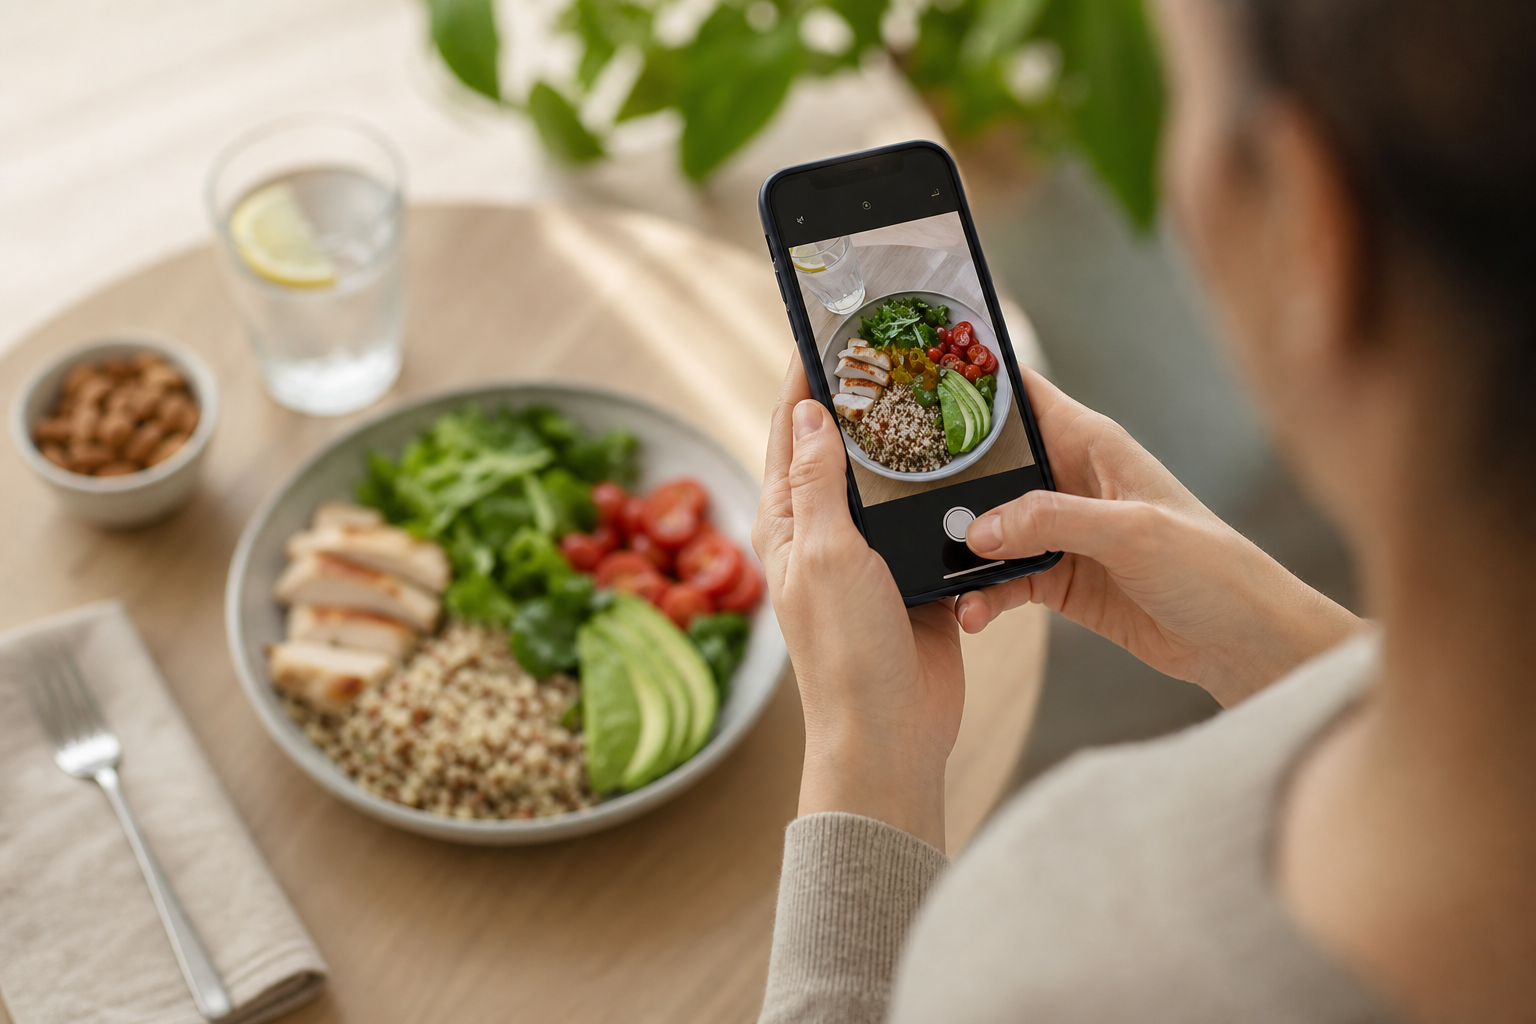
1) Big-name trackers with photo features
Apps like MyFitnessPal and Lose It! added image recognition on top of huge food databases and barcode scanning. They’re good if you want community groups, lots of entries, and a familiar interface. The photo feature helps you log fast; the database helps refine details later.
2) AI-first apps built around the camera
Some newer tools center the entire experience on snapping meals. One option you can try is Calorie Tracker Buddy. It focuses on photo-based tracking with real-time feedback on meals and snacks, macro tracking, daily step tracking with a 10,000-step goal, and goal predictions that show how each meal impacts progress. It can also sync with fitness trackers like Google Fit, supports offline logging of meals with auto-sync later, and includes a playful virtual buddy that “grows” as you make healthier choices. Beginners like this because there’s less to learn before you get value.
3) General AI tools as a free shortcut
You can also snap a photo and ask a general AI to estimate calories. It’s a quick, no-signup path, but you won’t get trend graphs, streaks, or history. For building a long-term habit, dedicated tracking tends to work better.
What to look for before you commit
- Free tier or trial so you can test the flow
- The ability to edit AI estimates and portion sizes
- Macro tracking and water tracking, not just calories
- Sync with wearables and steps, plus goal predictions
- Offline logging and auto-sync for travel or spotty service
- Export options (CSV/PDF) so you own your data
- Clear privacy controls for photo storage and deletion
For a neutral overview of what matters, browse this guide to photo calorie counter features. If you want a time-saving snapshot of how photo logging stacks up to manual methods, see this practical walk-through of a photo calorie counter.
Also Read!
How to Track Calories with Photos When You Barely Have Time to Eat
What to Do This Week: Your Photo Calorie Counting Starter Plan
A seven-day micro-plan lowers the bar and builds momentum. You don’t change your food yet. You learn, with less stress.
Day 1–2: Download and photograph lunch only
Install a photo counter. Photograph just your lunch. Don’t tweak your meal. You’re building the snap-and-save reflex. If your app shows real-time updates on meals and steps, great, note the day’s totals but don’t chase them yet.
Practical extras:
- Take two photos from slightly different angles if the lighting is tough, then upload the clearer one.
- If you forgot a snap, add a quick manual entry with a note; imperfect is still useful.
Day 3–4: Start correcting portions
Open yesterday’s photos. Did the app call your bowl 1 cup when it was closer to 2? Fix it. Are you surprised by any numbers?
Write down one “aha” per day. Maybe your go-to wrap is 620 calories, not 420. That’s useful, not bad.
Mini checklist when correcting:
- Portion size: cups/grams look plausible?
- Cooking method: baked/fried/grilled match what you ate?
- Hidden add-ons: oils, nuts, seeds, cheese, dressings, syrups?
Day 5–6: Add a second meal
Track breakfast or dinner too. Keep the checks short: verify the main foods, adjust the portions, and add any oils or sauces. If you walk, let the app log steps so you see intake and burn together.
Easy win ideas:
- Add 20–30 g of protein to the smaller meal (eggs, yogurt, cottage cheese, edamame, chicken).
- Swap a creamy dressing for vinaigrette or use half the packet.
- Choose water or unsweet tea for one meal to save ~100–200 kcal.
Day 7: Review your week
Look at averages for the meals you tracked. How close were you to your rough daily goal? Pick one small tweak for next week: add 20–30 grams of protein at lunch, swap a creamy dressing for a vinaigrette, or add a 20-minute walk. Beginners starting their health journey do best with small, repeatable moves.
Review prompts to use
- Which meal gave you the biggest surprise in calories?
- What add-ons (oil, sauce, drinks) did you miss the first time?
- What one change would reduce 150–250 calories without feeling hard?
If you want examples of short-cuts and pre-log tricks, keep this page of calorie counting hacks open for week two.

Try photo logging free today →
Conclusion: Start Simple, Stay Consistent
Photo calorie counting removes the biggest barrier that stops most people from tracking: the time and effort it takes to log meals manually. By snapping a picture instead of typing, weighing, and searching databases, you can build a sustainable habit that actually sticks beyond the first week.
The key takeaway for beginners is this: start with just one meal, give yourself permission to use estimates rather than perfection, and focus on consistency over the next 7–14 days. Once the habit feels natural, you can expand to more meals, fine-tune your portions, and make small adjustments that compound into real results.
Remember that photo calorie counting is a tool for learning, not judgment. Each snap teaches you something about portion sizes, hidden calories in oils and sauces, and which meals keep you satisfied within your goals. The faster feedback loop means you can adjust your next meal in real time, not wait until the end of the week to see what went wrong.
If you're ready to try it, download a photo-first app today, photograph your lunch tomorrow, and spend just 10 seconds reviewing the AI's estimate. That small step is how lasting habits begin. You don't need to be perfect; you just need to start.
Frequently Asked Questions
How accurate is photo calorie counting compared to manual tracking?
Photo calorie counting typically estimates within 10–20% of manual logging for common, well-photographed meals. The accuracy depends on lighting, portion visibility, and how mixed the dish is. Simple plates like grilled chicken with rice tend to be more accurate than soups, casseroles, or restaurant meals with hidden ingredients. While not lab-precise, photo logging is accurate enough to create consistent awareness and drive better food choices. The real advantage is that you'll actually do it instead of skipping logs because manual entry feels too slow.
Can I use photo calorie counting if I cook at home or meal prep?
Yes. Photo logging works well for home-cooked meals and meal prep. Snap the finished plate just like you would at a restaurant, then spend 10 seconds correcting key ingredients the AI might miss, like cooking oils, butter, cheese, nuts, or dressings. If you make the same recipe regularly, many apps let you save it as a custom meal for one-tap logging later. For meal prep, photograph each container once, verify the portions and macros, and then reuse that entry throughout the week. This approach is faster than re-logging the same meal daily.
Do I need to weigh my food when using photo calorie counting?
No, you don't need a food scale to start. Photo apps estimate portion sizes from visual cues, so you can begin logging immediately without extra equipment. However, a scale can be helpful if you hit a plateau, want tighter accuracy for specific goals, or need to calibrate your eye for common portion sizes. Many beginners find that snapping photos for 2–3 weeks teaches them enough about portions that they can eyeball servings accurately even without ongoing weighing.
What should I do if the app identifies my food incorrectly?
Always spend 10 seconds reviewing the AI's estimate before saving. If the app misidentifies a food, tap to correct it to the right item. If the portion size looks off, adjust it up or down. Common mistakes include confusing white rice with cauliflower rice, underestimating pasta portions, or missing oils and sauces. Fixing these small errors can shift your daily total by 150–300 calories, which makes a real difference over a week. Think of the AI as a helpful first guess that you refine, not a perfect answer you accept blindly.
Can photo calorie counting work with restaurant meals or takeout?
Yes, but expect slightly wider error margins because restaurant meals often have hidden oils, butter, sauces, and larger portions than home-cooked versions. Take a clear, top-down photo before you start eating, making sure all sides and sauces are visible. When reviewing the estimate, add a mental buffer for cooking fats and taste for heavy seasoning or creamy textures that signal extra calories. If your app allows notes, mention the restaurant or cooking style ("fried," "creamy sauce," "extra cheese") to help future estimates. Even with less precision, logging restaurant meals keeps you aware and prevents the "I'll just skip today" habit that derails progress.